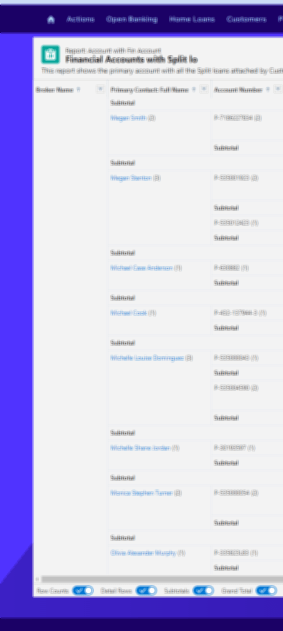

Adjusting the display size of report summaries in Salesforce Community can make a significant difference in how data is presented and consumed by users. Be default, somehow the report component size is fixed. This guide will walk you through a simple process of customizing the size of your report using CSS.
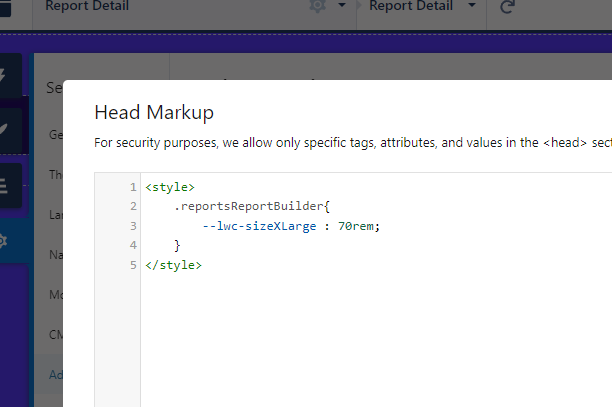
Access Head Markup Settings: To begin, navigate to the Builder section within your Salesforce Community workspace. From there, proceed to ‘Settings’ and then ‘Advanced’. Here, you’ll find the option to ‘Edit Head Markup’. This is where you’ll be adding your custom CSS code.

Adjust the CSS Variable: The key to changing the report summary size lies in the --lwc-sizeXLarge CSS variable, which defaults to 40rem. To make your report summary larger and more in line with your design needs, you’ll need to adjust this value. For example, setting it to 70rem can significantly enhance visibility and integration with your site’s layout. Below is the CSS code snippet you’ll need to insert into the Head Markup:
<style>
  .reportsReportBuilder{
    --lwc-sizeXLarge: 70rem;
  }
</style>
Publish Your Changes:
After inserting the CSS snippet, save your changes and publish your site. You’ll notice that the report summaries now better fit your community’s design, providing a more cohesive and user-friendly experience.
